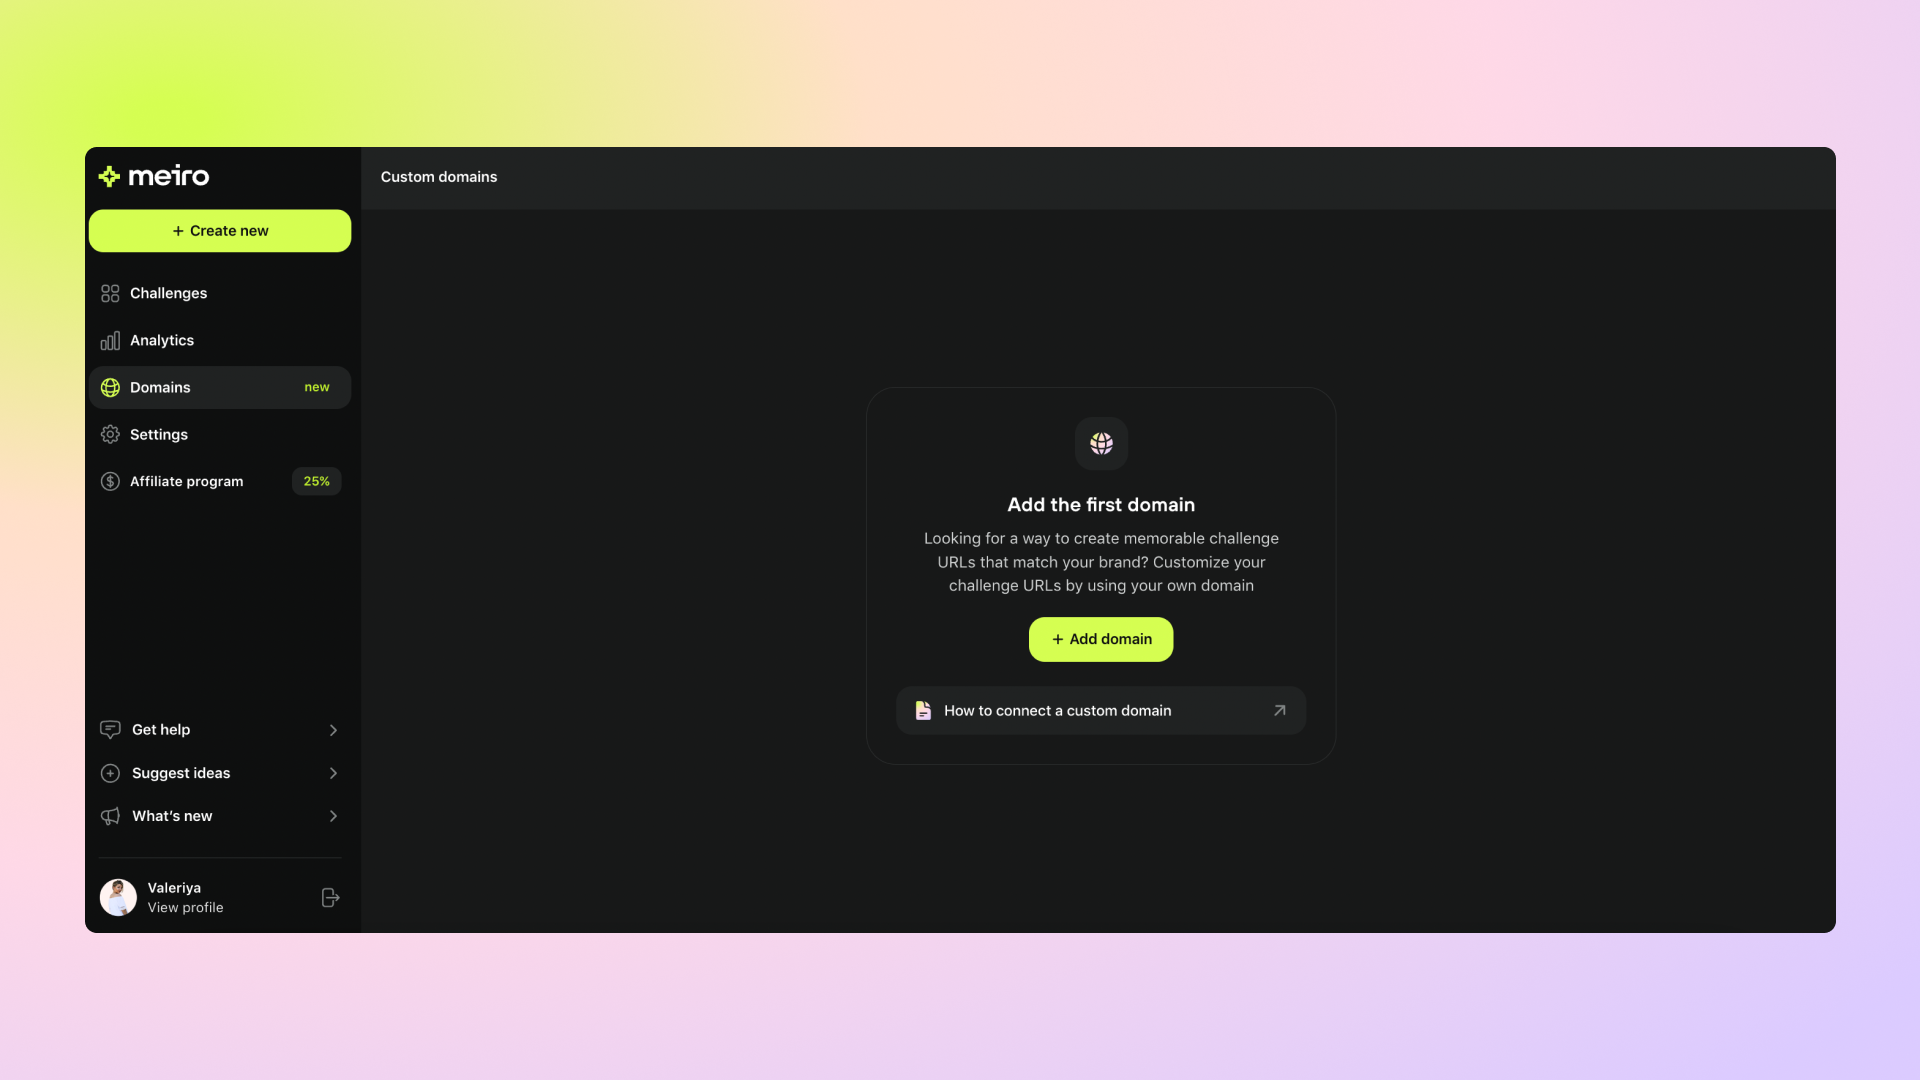
You can make your challenge URLs more memorable and accessible for your users by customizing them with your own domain.

Connecting a custom domain to a website or service typically involves several steps. Here's a step-by-step guide to connecting a custom domain:
If you haven't already, choose and register a custom domain through a domain registrar such as GoDaddy, Namecheap, or Google Domains.
Open your Meiro account and go to the Domains page. Click on "Add domain" button.
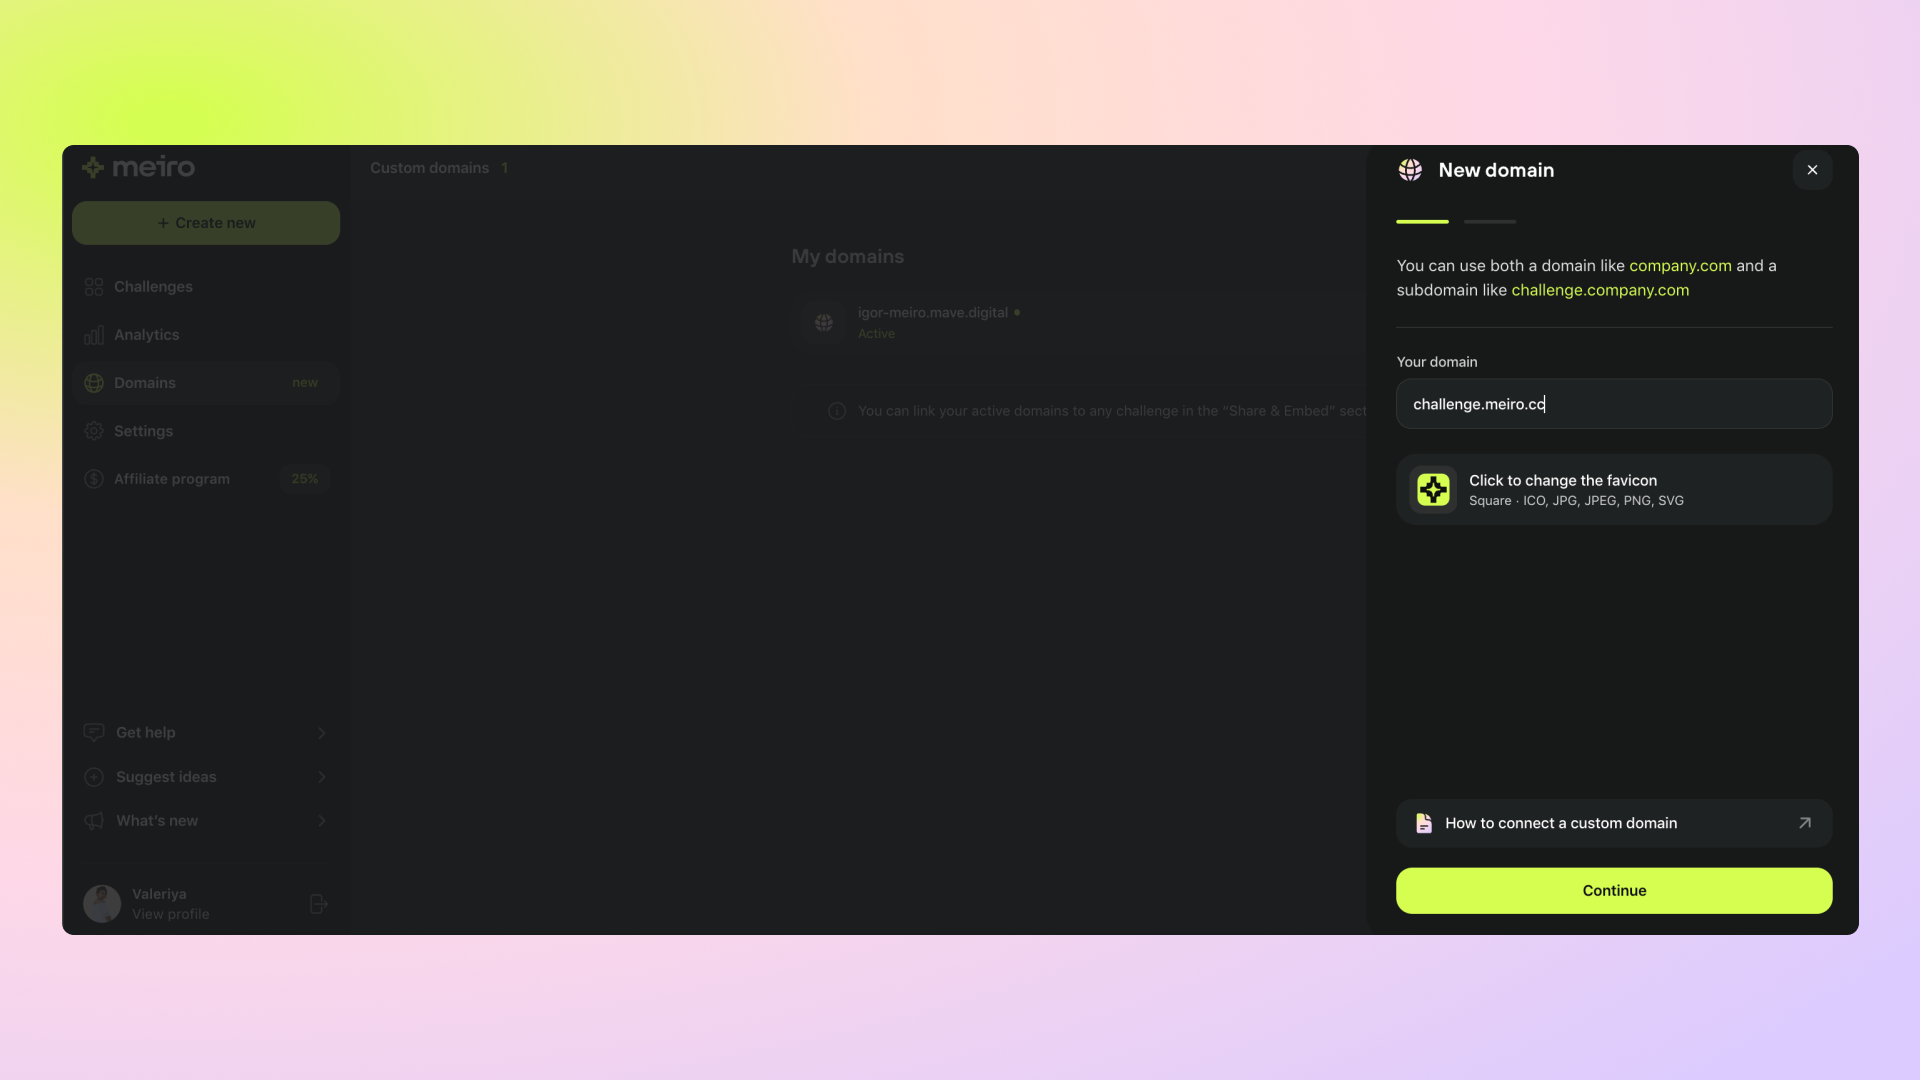
Enter the custom domain you'd like to point your challenges to. Meiro supports adding both a domain (e.g. company.com) or a subdomain (e.g. challenge.company.com).

Log in to your domain registrar's account and navigate to the DNS settings for your domain.
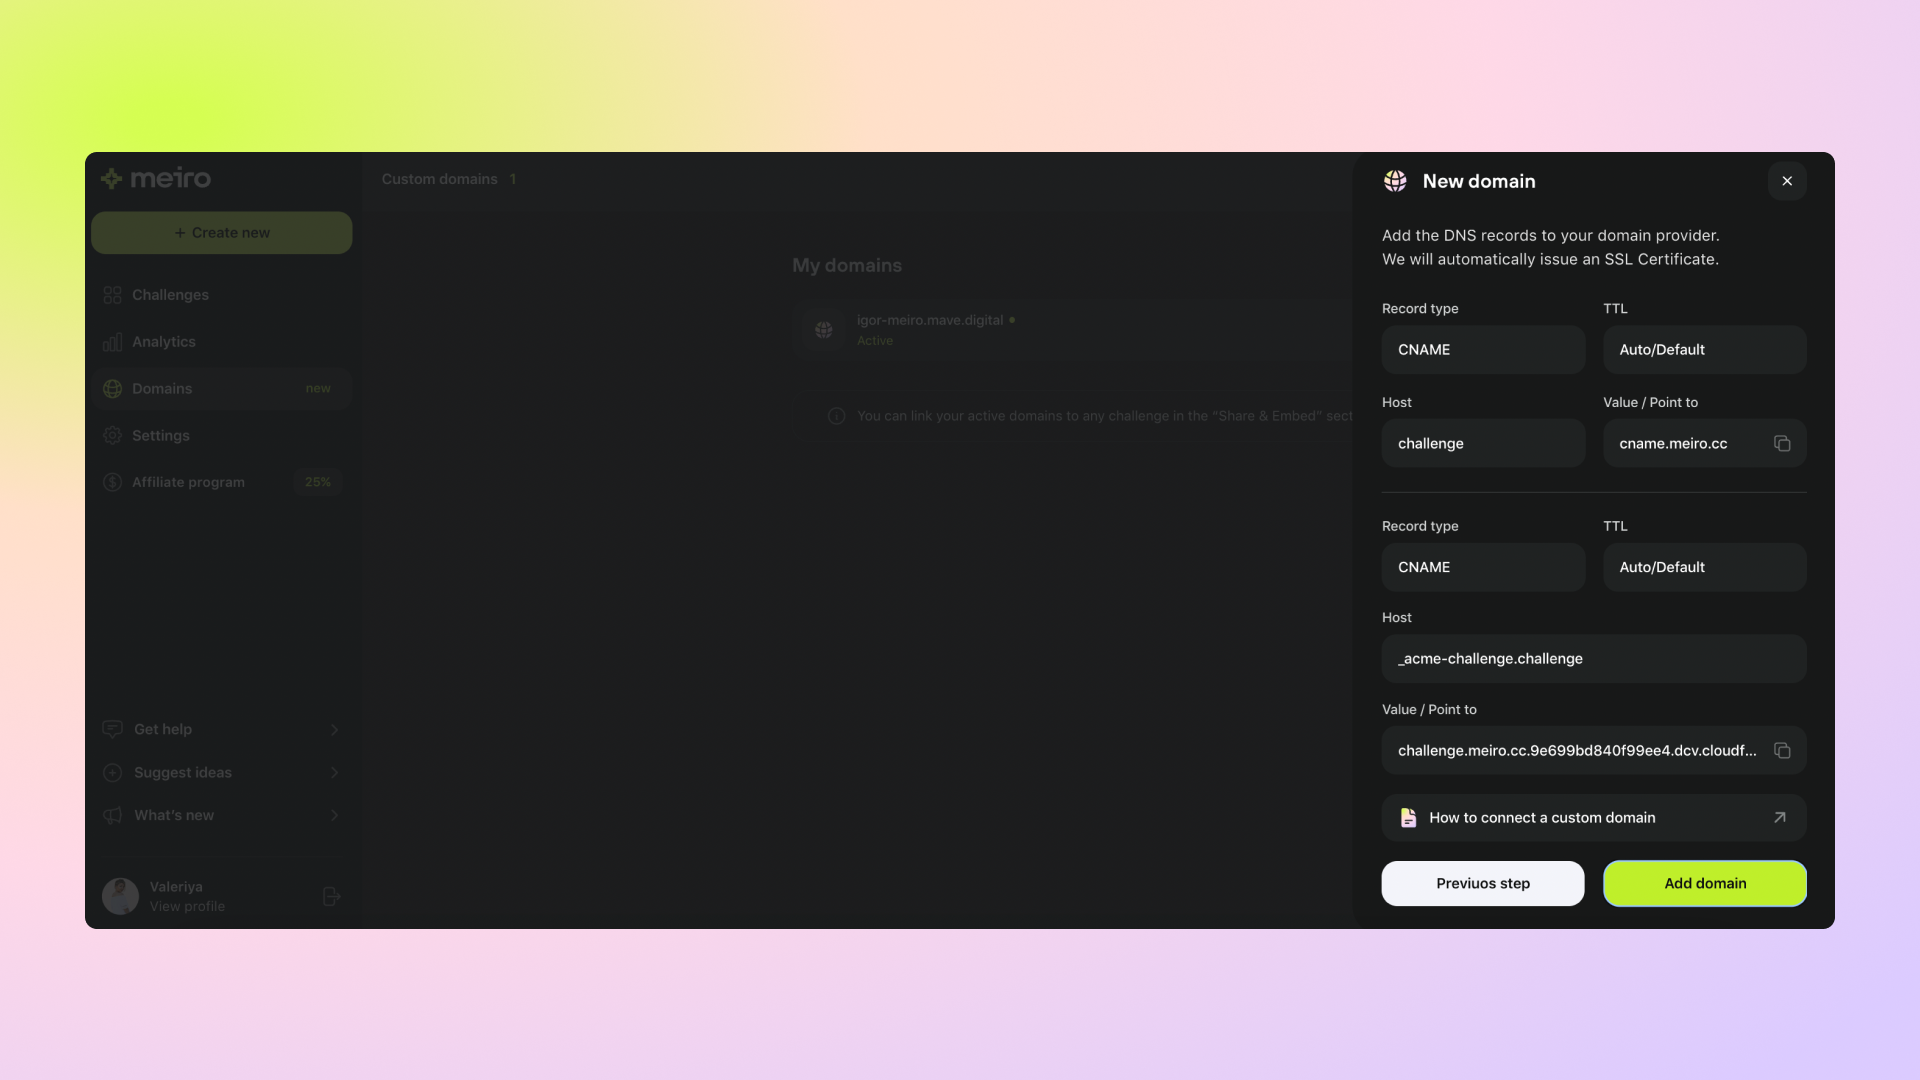
Add the DNS records you receive from Meiro to your domain provider settings (please refer to the example screen below). You don't need to worry about configuring an SSL certificate as a separate step; we will automatically issue it to you.
You will see your domains list along with the verification status for each of them in the next menu. Click the "Verify" button to start the verification process.

Once the changes have propagated across the internet, you will see the "Active" status next to your domain in the domain list.

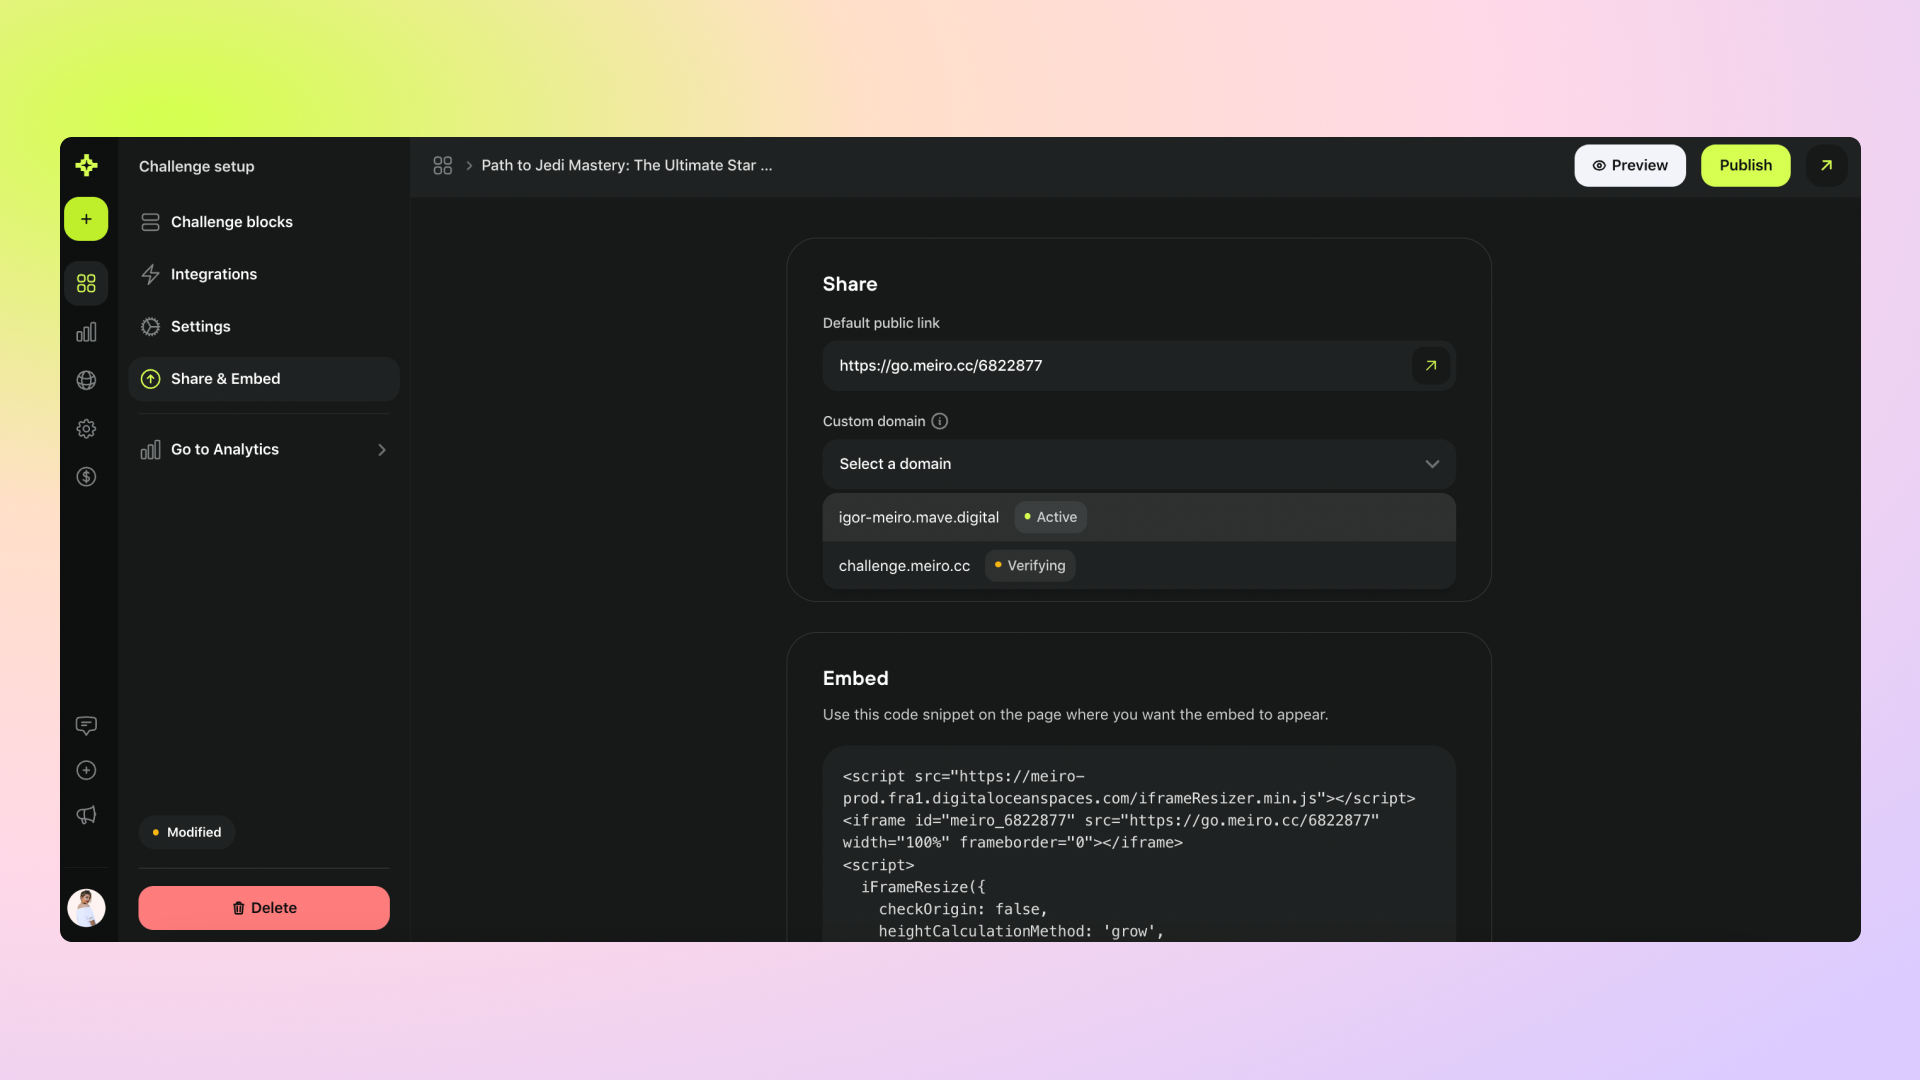
In order to link your active domain to your challenge, simply go to Share & Embed section in your challenge setup. From there, you can select the domain you would like to link with a selected challenge in the drop-down list.
Once everything is set up, test your custom domain by accessing it in a web browser. Make sure the website or service loads correctly and is secure.
That's it! Great job on completing this task 🙌
