The Email Verification feature helps you confirm participants' email addresses, ensuring accurate and reliable contact data for future engagement.
To get started with it, you would need to purchase the add-on first:
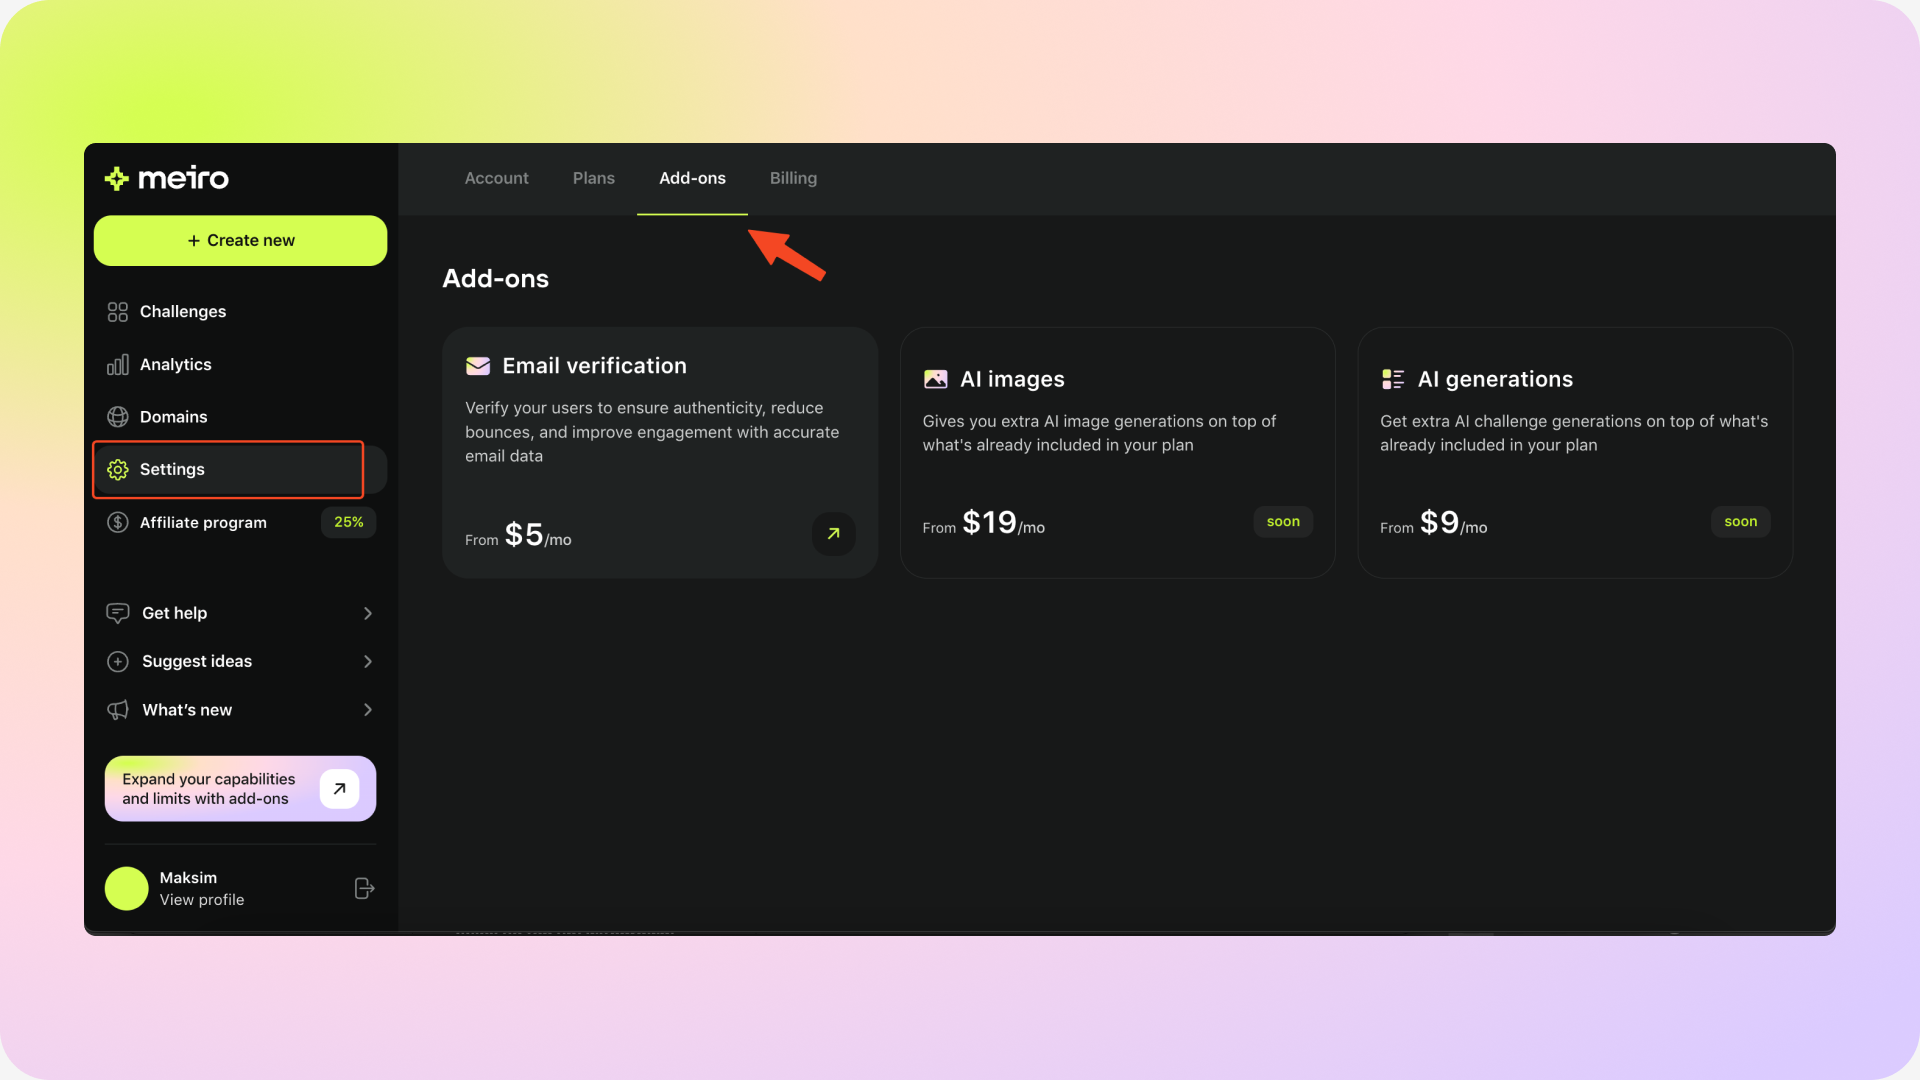
Go to Settings and click on the Add-ons tab. Select the Email verification add-on
Select the number of verifications you need. You can select from 500, 1000, 2500, and 5000.

You will be redirected to the payment page. After the payment is completed, you can start using Email Verification right away.
Next, you would need to enable the Email verifications for your challenge:
Click on the challenge you would like to enable verifications for
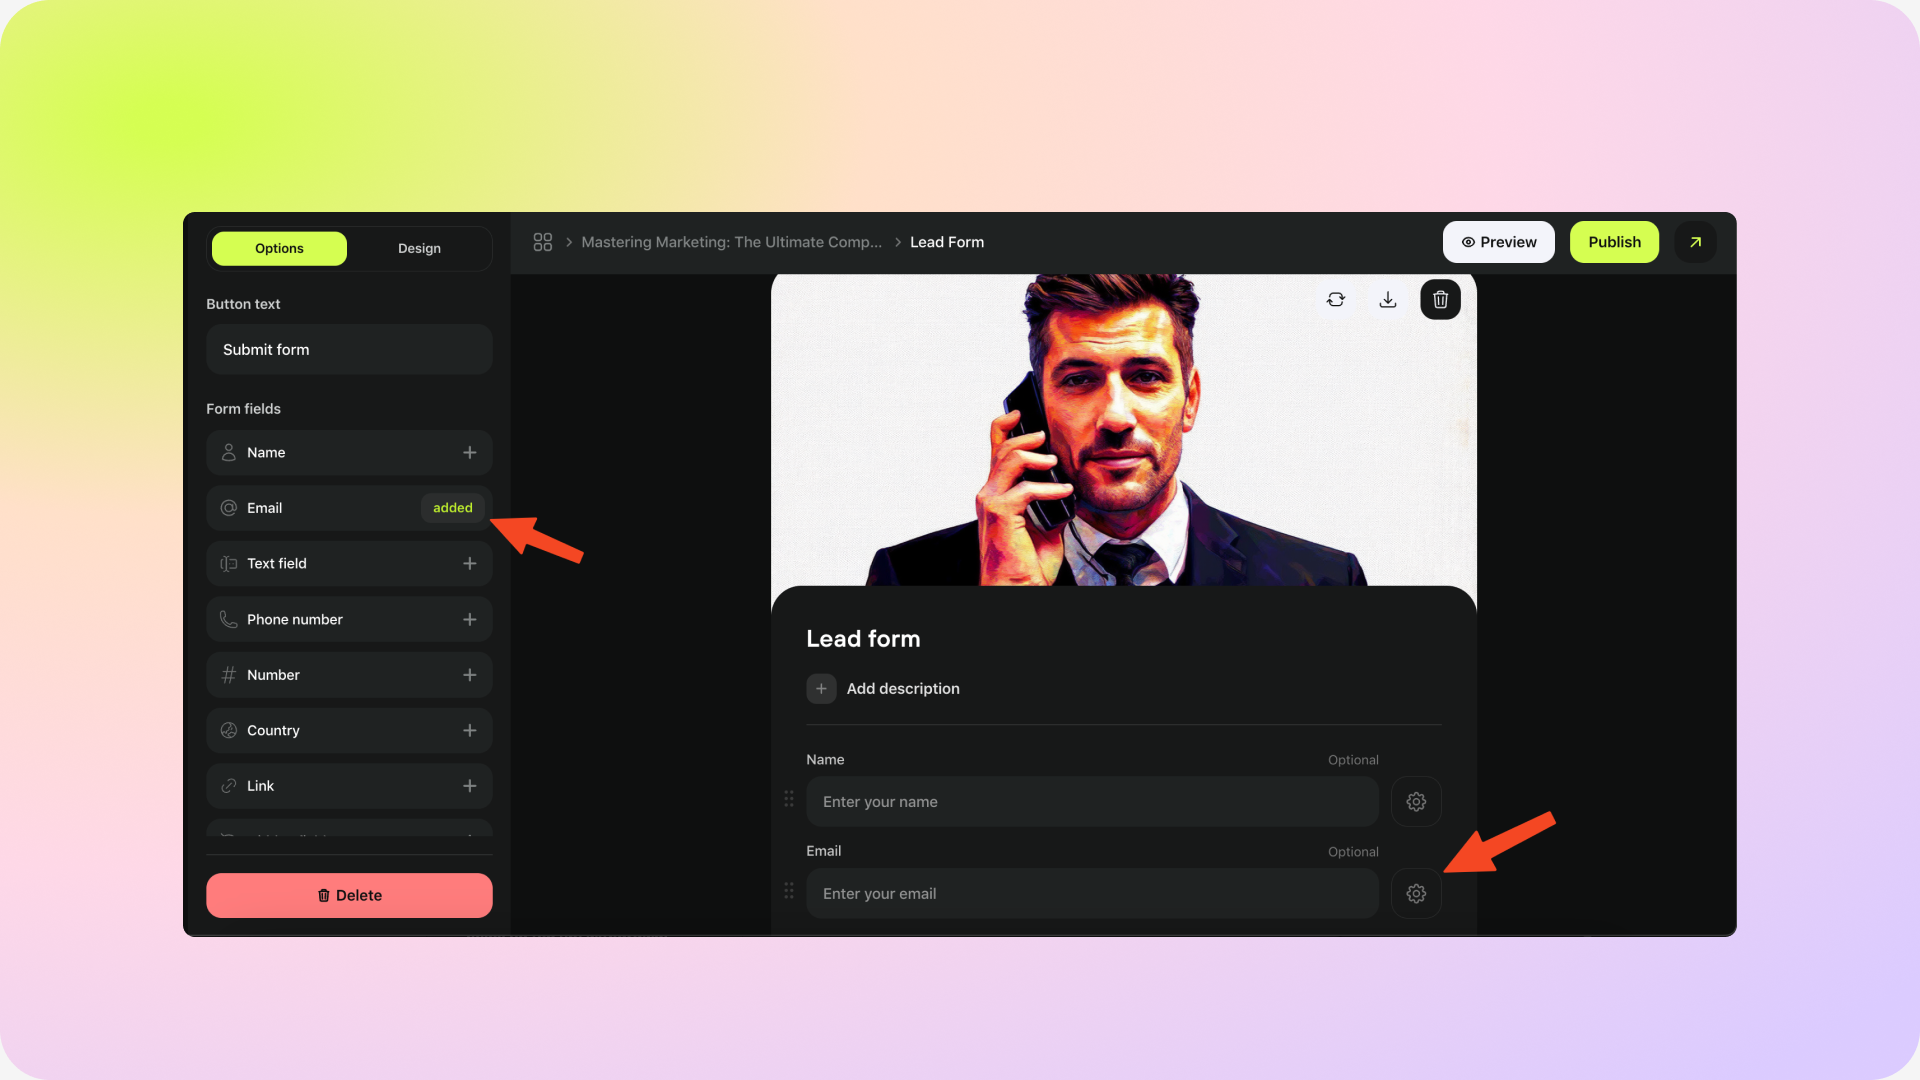
Add a Lead form to your challenge, if it hasn’t beed added yet
Add the Email field in the form and click on the Settings  next to it
Enable Email verifications
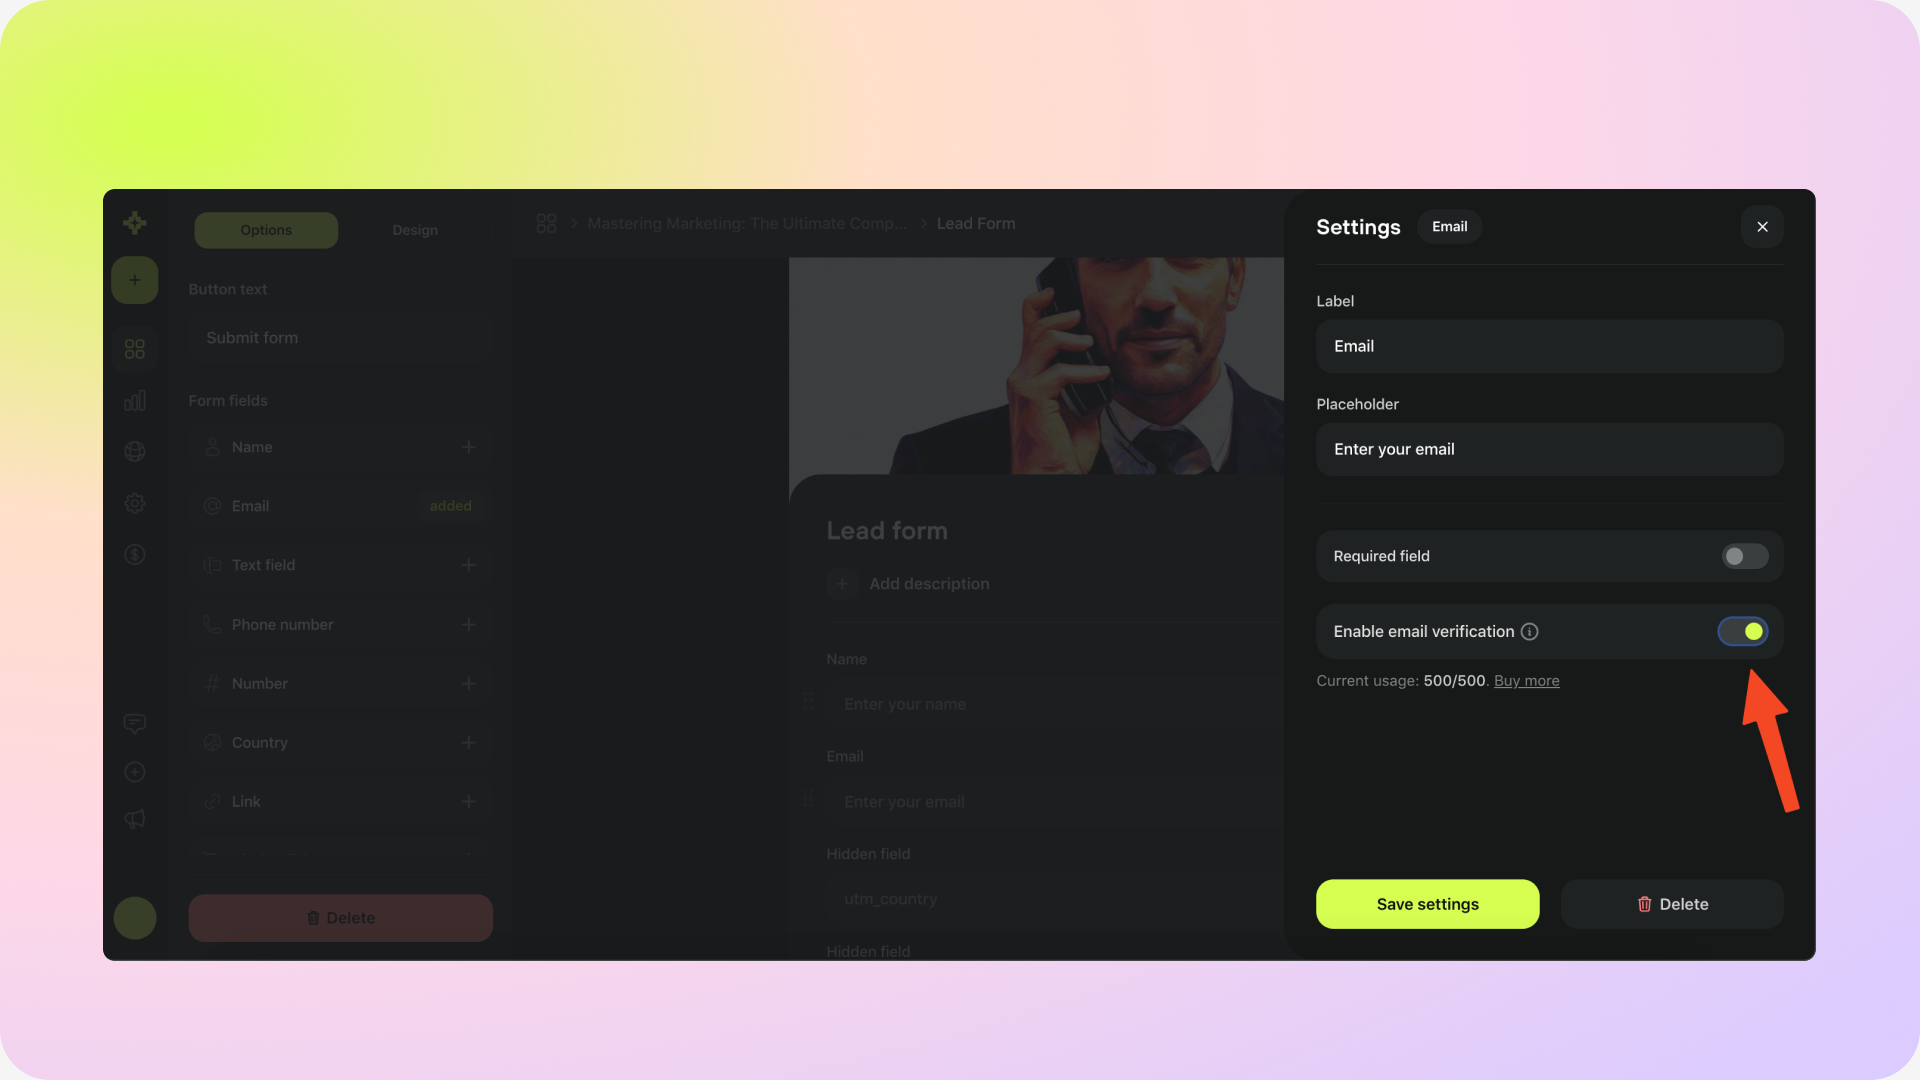

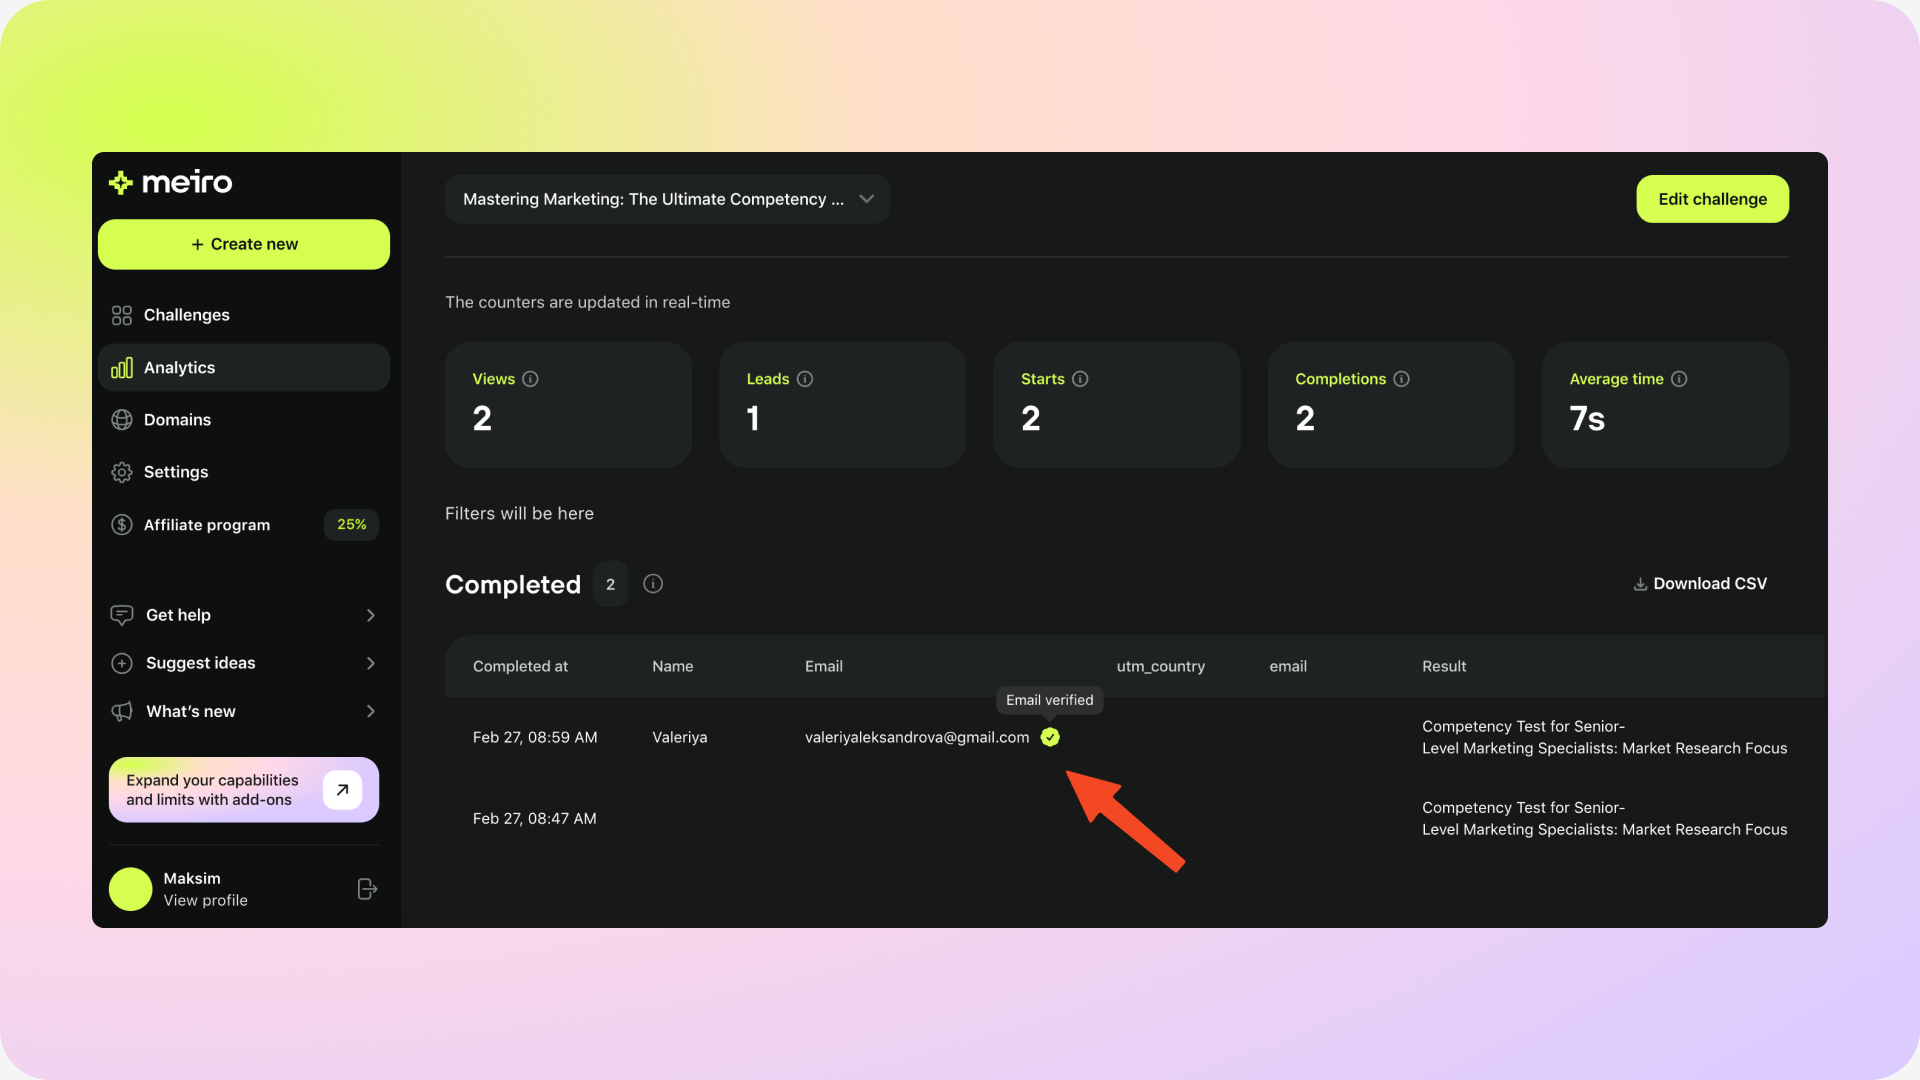
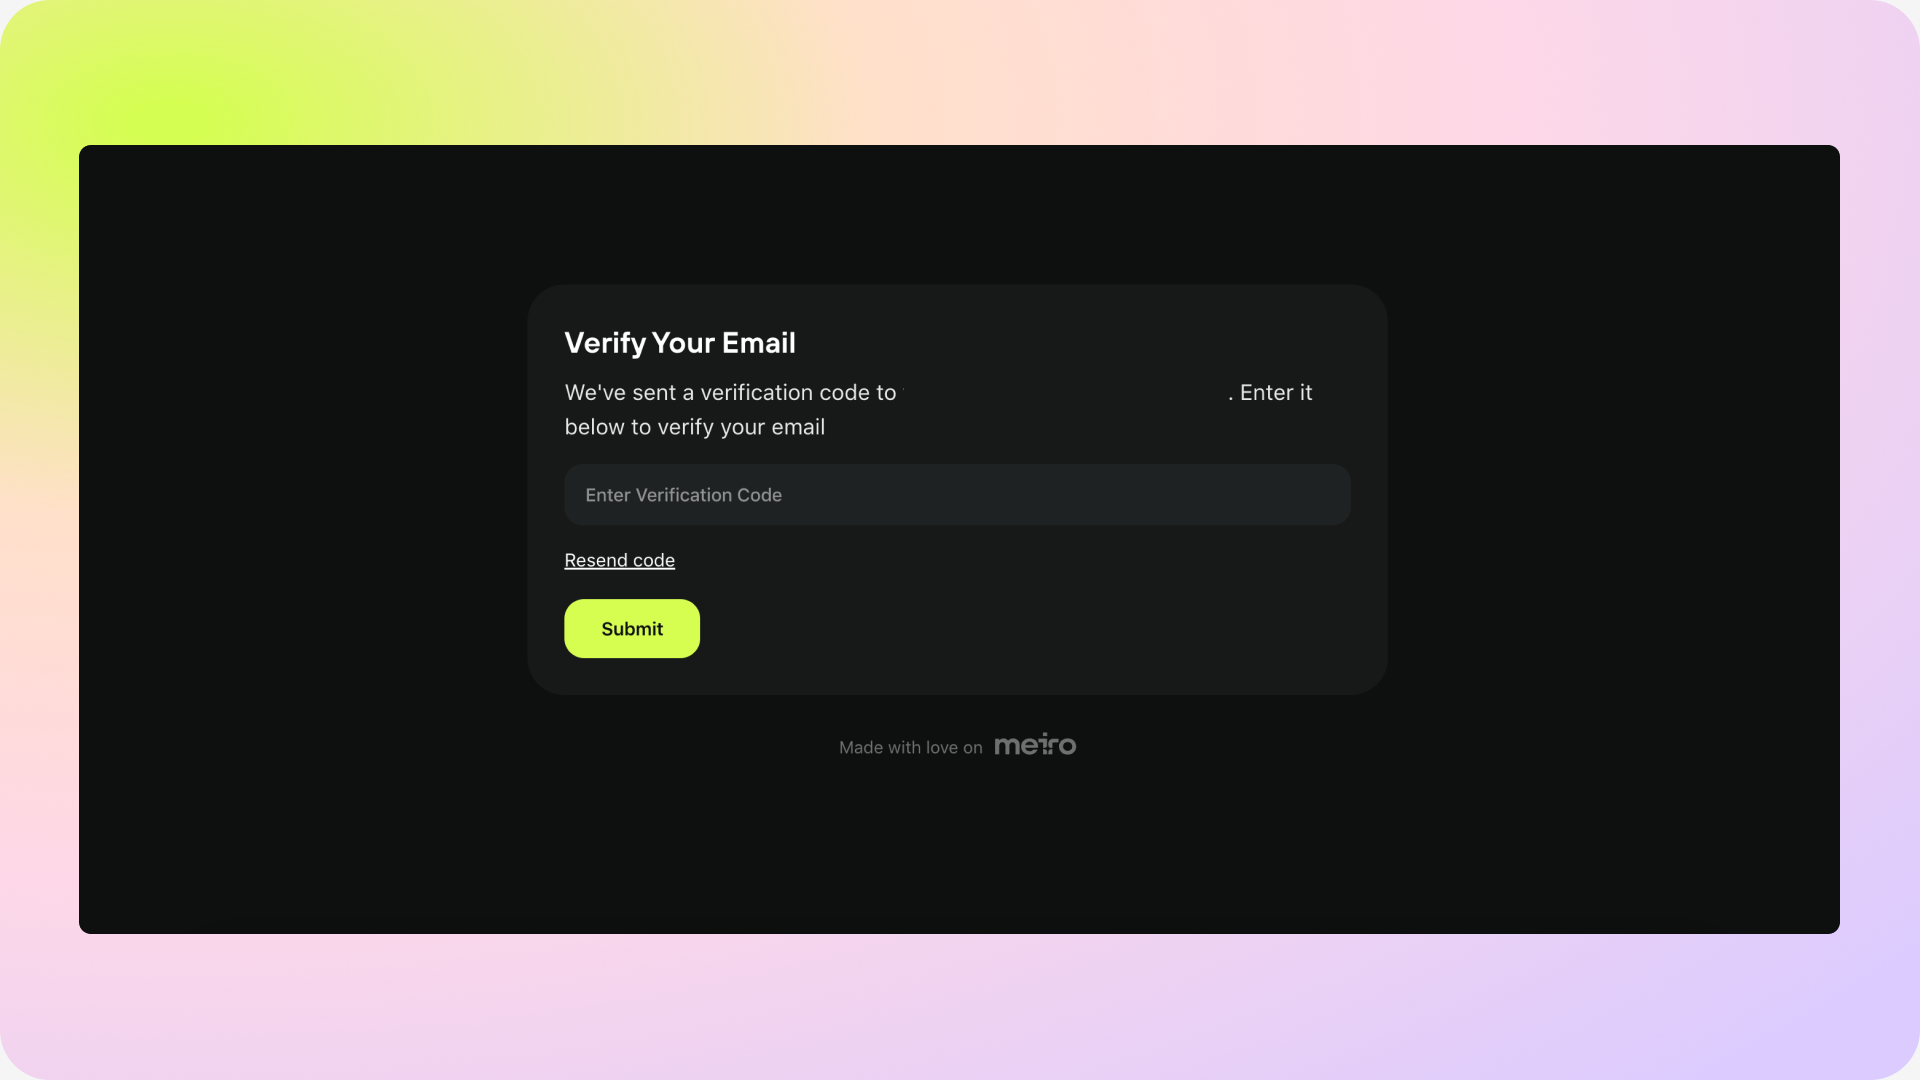
As a result, when a user enters their email address, they will receive a verification code to their email inbox. After they enter the code on the challenge page, they will be able to see the results of the challenge.
In the Analytics tab, verified emails will be displayed. You can also export the challenge data and filter by “Verified email = TRUE” for future targeting.