Zapier is a web automation tool that connects your favorite apps and services. It helps you automate and streamline online workflows—without any coding.
Below are a few use cases you can solve by integrating Meiro with Zapier:
Send participants’ (leads) data to your preferred CRM for further segmentation
Transfer participants’ (leads) data to your chosen ESP for email marketing campaigns
Set up custom workflows tailored to your business needs
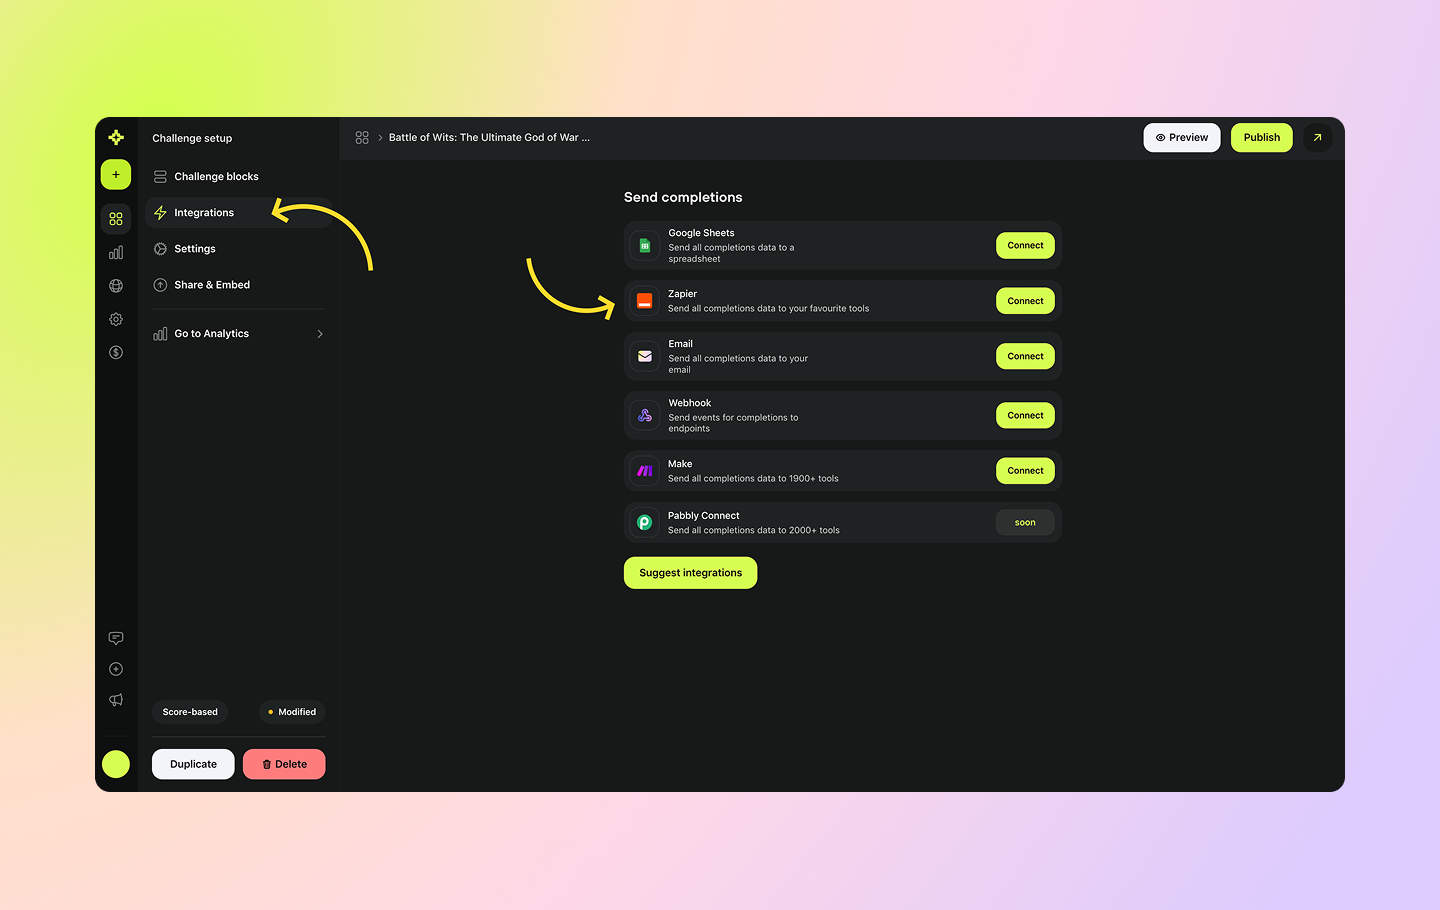
To set up Zapier, click on one of your challenges to open the challenge setup view and access the challenge tabs.
Then, navigate to the Integrations tab and click the Connect button next to Zapier.
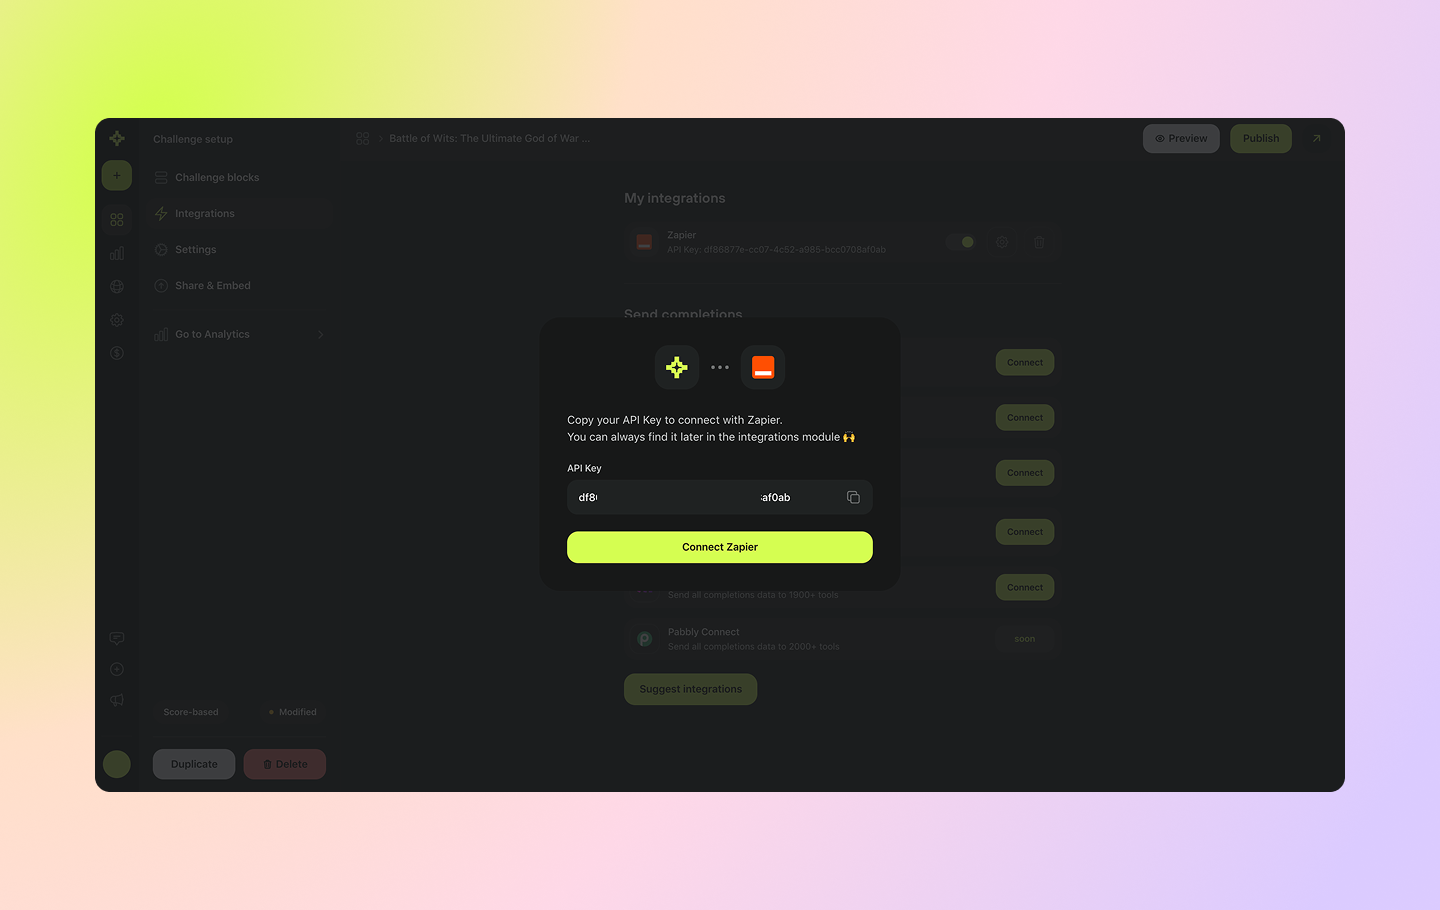
You’ll receive an API key that you’ll need to add on the Zapier side. Make sure to copy and save it for later use. Then, click Connect Zapier.
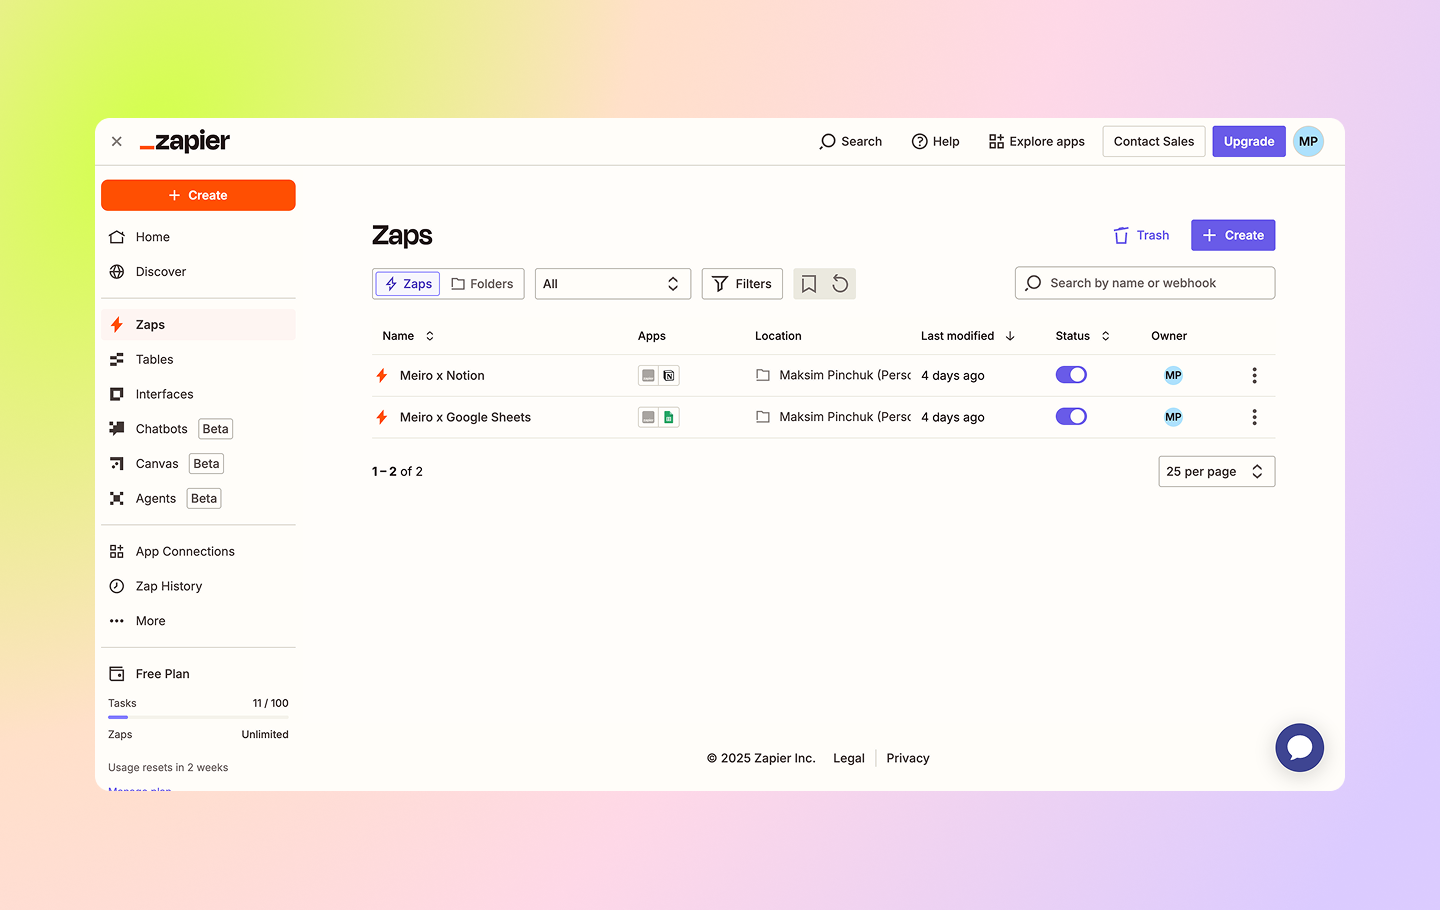
You will be redirected to Zapier and invited to use Meiro if you’re logged in there. Click on the Accept the Invite & Build a Zap.
In Zapier, you can view your existing Zaps (if any) or create a new one using the Meiro integration. Click the Create button to set up a new Zap.
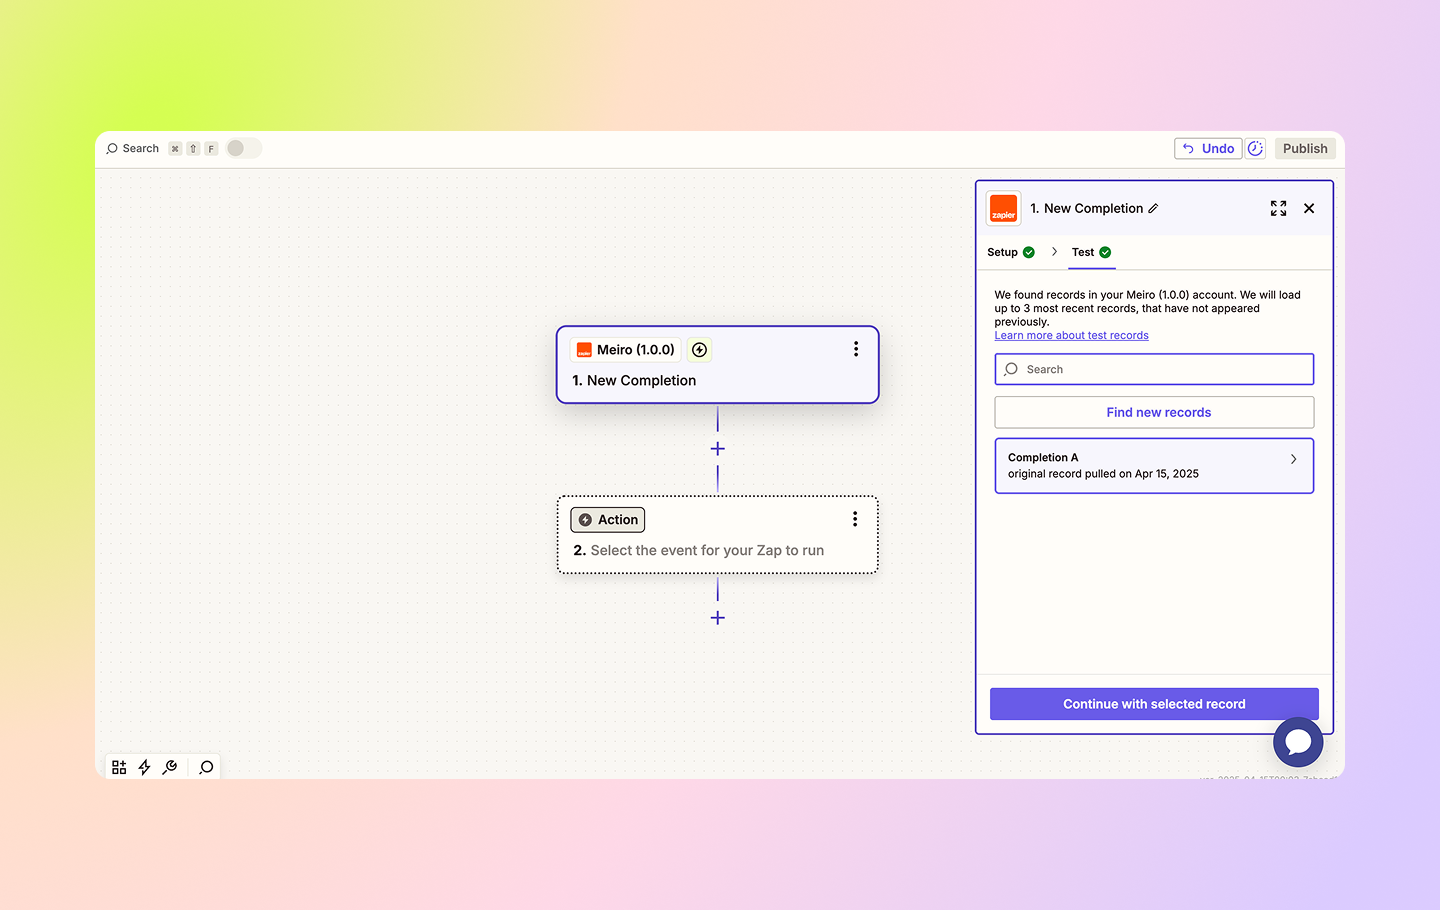
Select Meiro 1.0.0 in the first trigger step and select New Completion as the Trigger event.
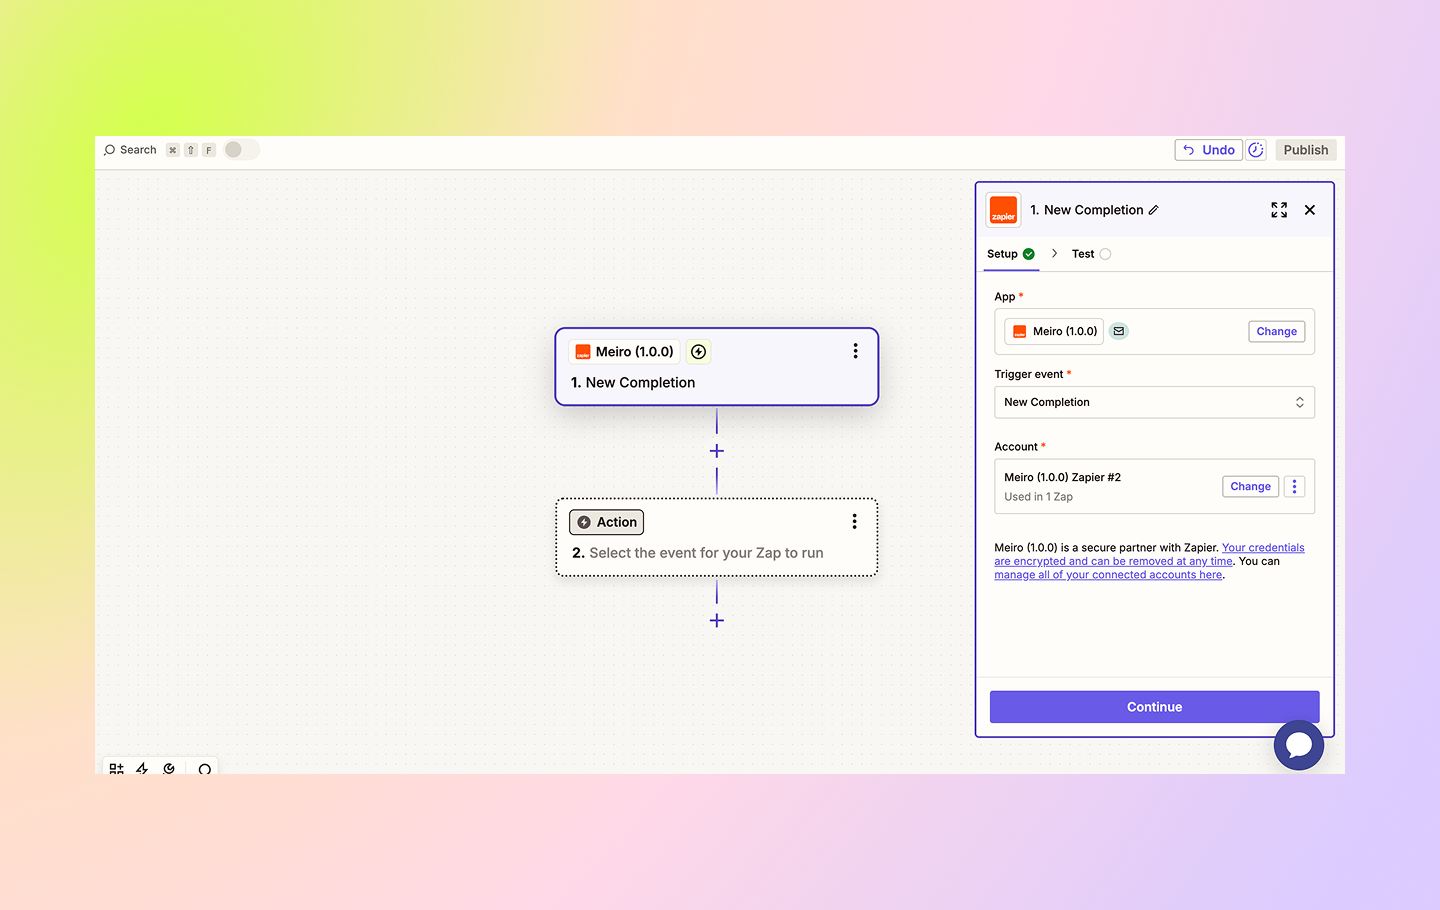
Next, you can test your integration with Meiro by pulling the latest completion record. If found, the step will look similar to the one on the screen below. Click on Continue with selected record to move to the next step.
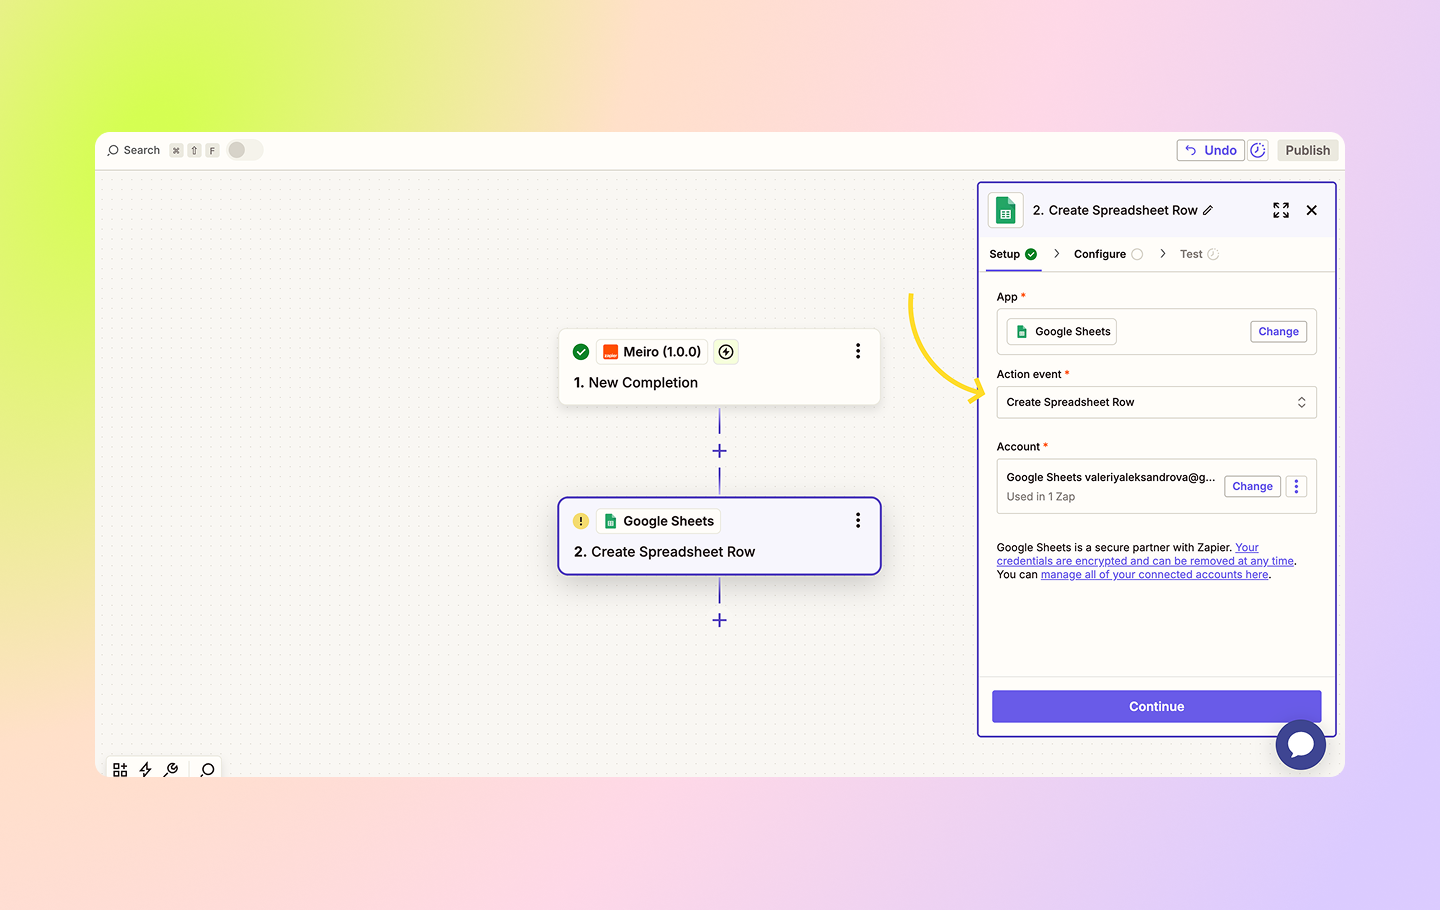
You can now choose an action that will be performed by Zapier once the trigger occurs. For example, you would like to send your completions to the Google Spreadsheet file. In this case, choose Google Sheets and select Create Spreadsheet Row as an action event.
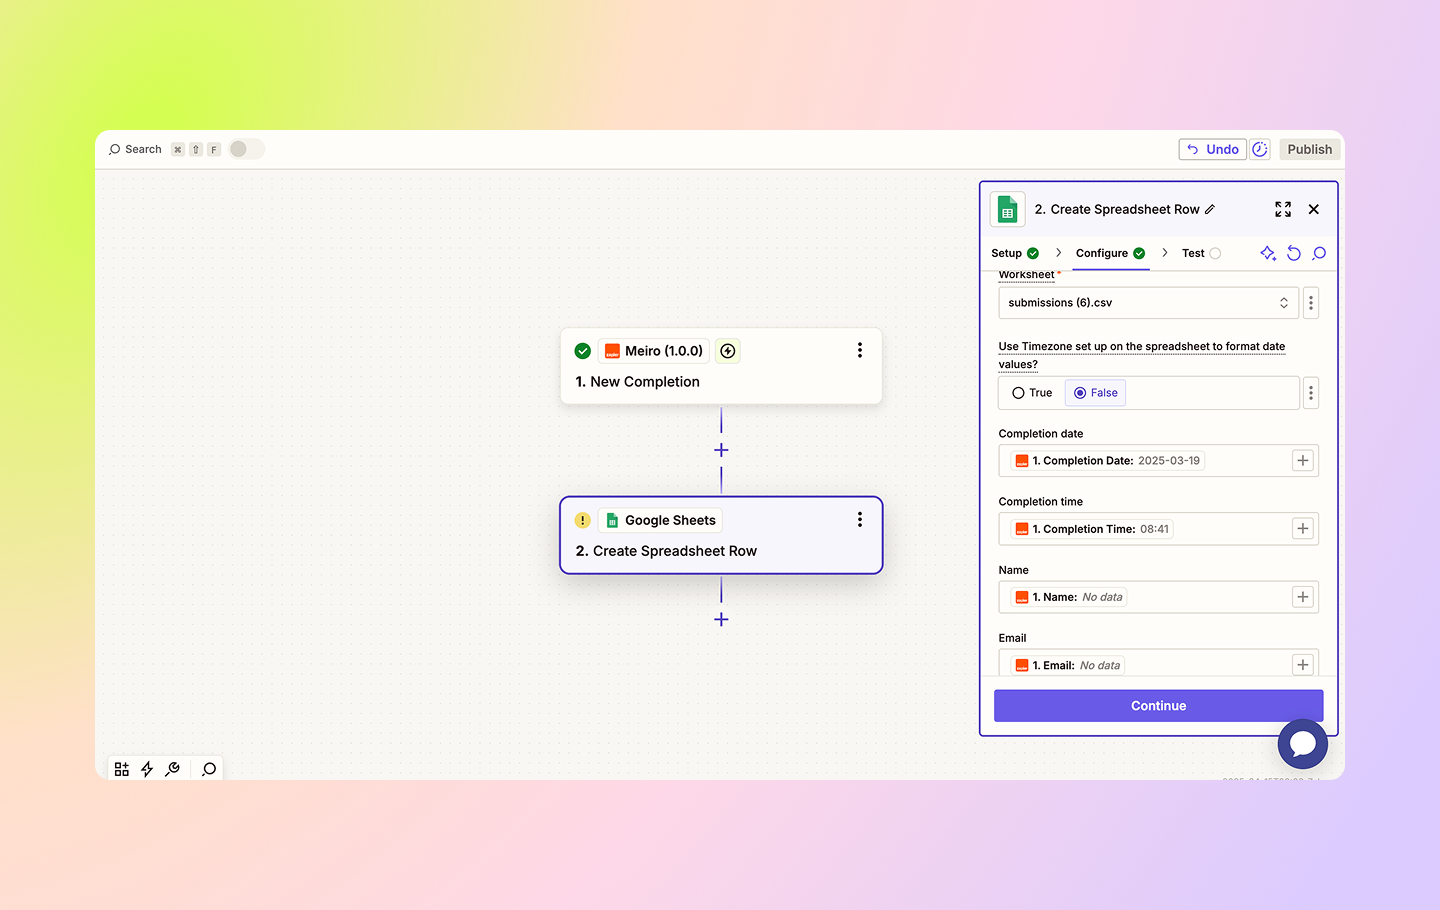
Next, you will need to configure the values to match the columns in your spreadsheet.

As the next step, you can either test the integration or set it to go live. Once done, click to publish your integration.
